*Some lesson plans and posts have information taken from the AIMS Education Foundation*
Monday, July 13, 2020
Introduction
The purpose of this blog is to provide fun, engaging and educational lesson plans, science experiments and activities for students and teachers to use in their classrooms. This activities and experiments will cover a variety of science topics including, heat, space, geography, magnets, light, sound, and many other topics. Some of the lesson plans will be presented in the form of written plans, online lessons through sites like Nearpod and Playposit, as well as some demo videos and printable papers. Hope you enjoy learning about and teaching SCIENCE!!
Color and Graphing - I Love Color
This lesson is designed for younger grades. The purpose of this lesson is to teach students about color, it is also an intro to ratios, and data gathering.


I Love Color Here is the link for the worksheets
Background Information:
Color is important in our world. We are delighted with the colors in flowers, in a sunset, in the leaves of autumn and in the brilliant colors of a rainbow.
Color is important in nature. The colors in flowers attract bees to help in pollination, color in fruit attracts fruit-eating animals, the color in some animals helps them attract mates.
Color also serves as a means of communication. For example, a red traffic light means stop, green for go. On the map, colors indicate certain things such as: blue indicates a body of water, black a highway or road.
A red object is red because it produces, reflects, or transmits only red light. White objects produce or reflect all colors; black objects absorb all colors.
A rainbow is a spectrum formed as white sunlight is refracted by tiny drops of water falling through the air. Each color has a different wavelength. Violet has the shortest wavelength; red has the longest wavelength. They are at opposite ends of the spectrum.

On this printout page from the link students will fill in the colors of the rainbow. Then they will fill out the rest of the paper.

Use this printout page to create a larger scale graph on the board, then give each student a sticky note, next one by one have them come up and place their sticky note in the column of their favorite color. Once that is done, give each student this printout and have them fill it out according to what the class put on the board.
Discussion Questions:
1. What was the favorite color of the class? How do you know?
2. Why do you think that color was the favorite?
3. Which was the least favorite? How do you know?
4. How many more students liked____than___? Explain how you know this.
5. Were there any tie votes?
Sunday, July 12, 2020
Heat - Curly Cue, Balloon Bottle
This lesson is taught through Playposit, students need to have an account to be able to do this lesson. This lesson can be done individually or in groups at school or at home as homework.
The purpose of this lesson is to teach students about heat currents and heat energy. It is meant to be an introduction to heat and an activity that they can do along with the video.
Saturday, July 11, 2020
Sorting and Estimating - Candy Factory
The purpose of this lesson is to help students practice estimating and sorting out materials and objects. This lesson is done with M&M's but can be substituted for many things: Skittles, Lucky Charms, Jelly beans, etc.


Link for the activity: Candy Factory
On the first page of the printout have the students make predictions for how many M&M's there will be in their package. 

After they have made their predictions, give them their bags of M&M's to sort through. They should sort them by color, then write the actual numbers in the chart next to their predictions.

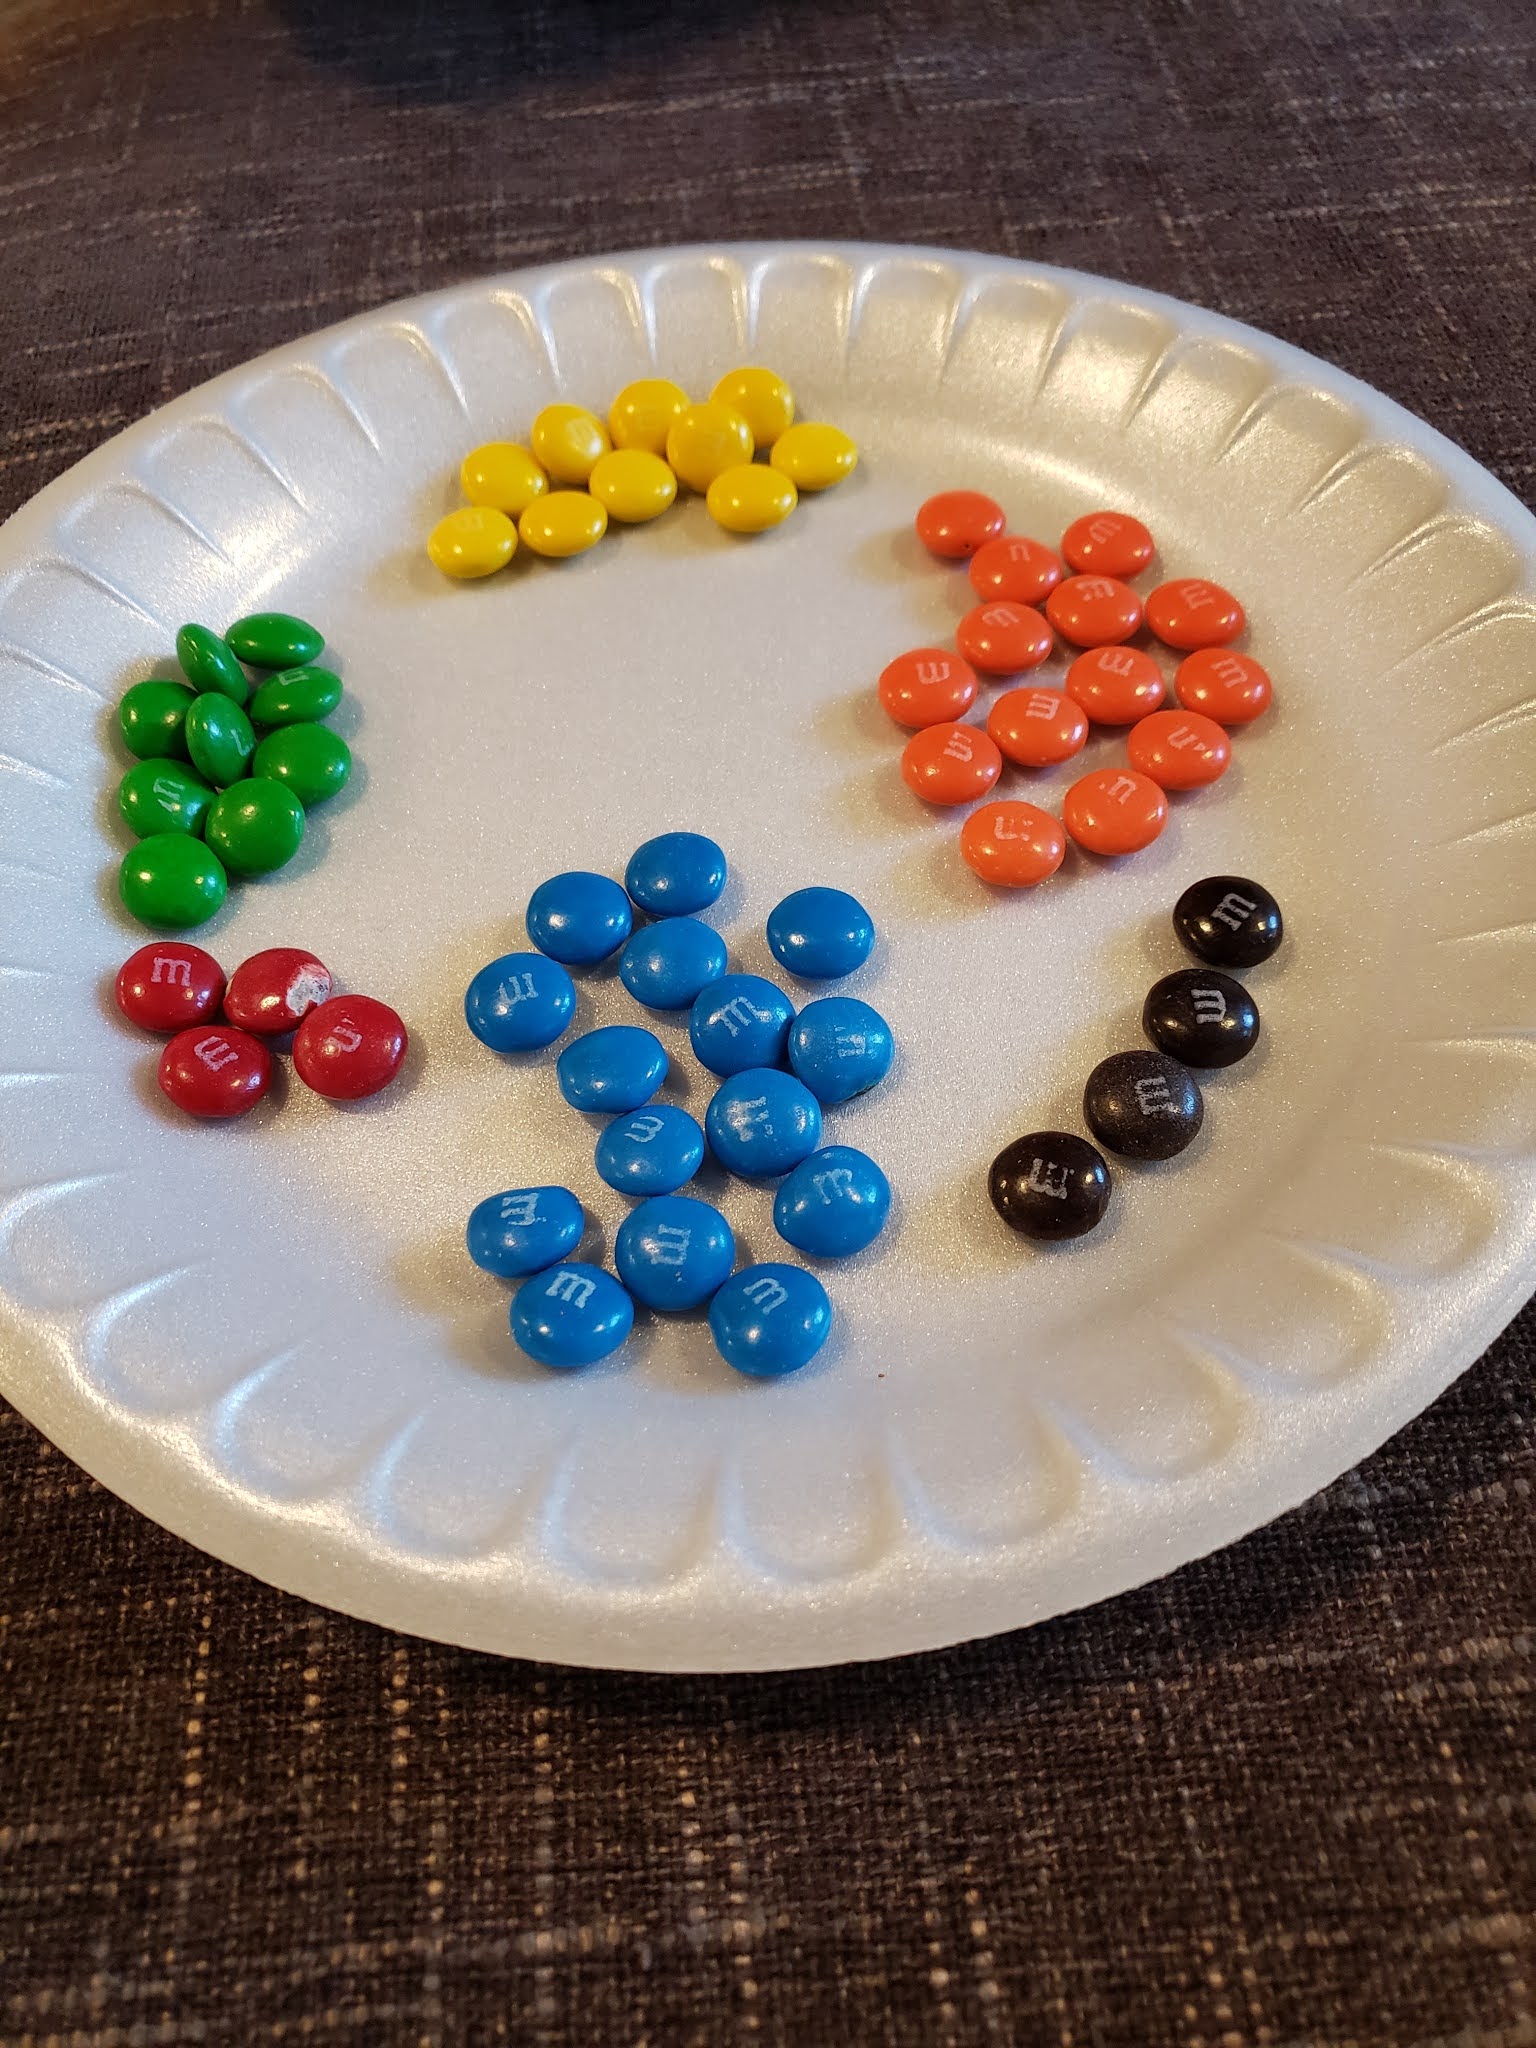
When that is done, give them the last page of the printout for them to fill in the graph. This will help them see the different amounts next to each other and better see what amounts had more or less than the other colors. After that have them answer the questions next to the chart. You can then have them discuss their different answers and why some of the students got different answers than others.


Chemical Reaction - Elephant Toothpaste
Elephant Toothpaste is an easy, fun, entertaining and engaging lesson activity that shows students how a chemical reaction works.
For this post I chose to use Animoto, which allowed me to document an experiment I did. Not only is this experiment fun, it shows children that learning about science can be fun, it's not all about numbers, and graphs, you can create things as well. This can be an easy activity to do in a classroom, the children can play with the finished product, and it can all go down the drain. The cons are that it can be hard to connect this to an actual scientific occurrence in nature, but you can also bring up volcanoes, or geysers like Yellowstone. You can ask the children if they have been to Yellowstone, then talk about why the geysers explode that way.
Materials:
-Empty plastic bottle
-Dry yeast (found in the baking section of the grocery store)
-Warm water
-Liquid dish soap
-3% hydrogen peroxide
-Measuring cups
-Measuring spoons
-Safety glasses
-Large tub or tray to catch the foam
-Location for the activity that can tolerate spills (of hydrogen peroxide as well as possibly food coloring), such as a kitchen or bathroom—or an outdoor location
-Liquid food coloring (optional)
-Different-shaped bottles or glasses (optional)
Weather - Weather Wear
This lesson is intended for younger grades as it is a lesson to teach students what clothes are appropriate for each season: swimsuit in summer, coat in winter, etc.


Use this link: Weather Wear. Print it out and give one to each student. Let them draw what they are wearing that day, then talk to them about what different clothes should be worn in different months of the year.
Discussion Questions:
1. What is the weather like today?
2. How does the weather influence what we wear?
3. What are some other factors besides weather that influence what we wear?
3. What are some other factors besides weather that influence what we wear?
Weather - Cloudy Logic
The purpose of this lesson is to teach students the different cloud types and their purposes.


Below is a link that contains two different activities that can be done to learn about clouds.
The first 3 pages in the link are for the same activity, diagramming the clouds. Print out the page that has all the cloud types on it and make sure each student gets one set of cloud types

These cloud types include Nimbostratus, Stratus, Stratocumulus, Cumulonimbus, Cumulus, Altostratus, Altocumulus, Cirrocumulus, Cirrus, Cirrostratus.
You can choose to have the students guess what goes where, or you can teach about each type individually then see if the students can figure out which one you're describing.
After you have discussed the types have the students cut out the papers and glue them next to their respective cloud on the next page.

Once they have finished gluing on their papers, you can have them either discuss who put which type where and if it is wrong or right. Or you can have them discuss if they have ever seen any of these cloud types before.
You could also take them outside, if possible, and let them see what kind of clouds are in the sky at the time.
One thing that I have used to help me remember the basic cloud types is this little song/jingle whatever you want to call it:
"Stratus is the flattest in the cloud family.
Cirrus is the highest it goes tickle tee-hee-hee.
Cumulus is cauliflower yummy as can be.
Nimbus is the rain cloud that rains on you and me."
Once they have finished with the other activities the last activity that is on the link above is a cloud book that they can cut out, fold, and color, then keep to help them remember, or to help them teach someone else.


Weather - Water Cycle
The purpose of this post is to give students an introduction to the water cycle. Below are some videos that can be used to introduce the water cycle unit.
Thursday, July 9, 2020
Magnets - What Will A Magnet Attract??
The purpose of this lesson is for students to discover what objects will be attracted by a magnet and why.
There are 4 separate activities for this lesson plan
1. Predict. Print out the prediction page through the link at the bottom. This page is meant to be done before you start the lesson. Have the students cut out the objects on the page then glue them in either the attract of not attract categories on the paper if they think the magnet will pick it up or not.
2. This activity is meant to be done in class with several different materials, so the students can test the different objects out and keep a record of them.
3. This activity is meant to be done at home after doing the other one in class. Giving each student a magnet to borrow and take home have them try to find things around their home that may or may not be attracted by a magnet then recording them on their paper.
4. This last activity is optional. It can be used as an assessment at the end of the unit, or additional work if the students need extra practice to retain the information.
Link for all 4 activities: Magnetic Attraction
Background Information:
All substances actually display magnetic properties, but most show them to such a very small degree that we usually consider these materials nonmagnetic. Highly sophisticated scientific equipment is needed to detect magnetic characteristics at these low levels. On the other hand, a few metallic elements such as iron, nickel, cobalt, rare earths, plus some of their alloys like steel and strontium ferrite display magnetic properties strongly enough to be considered magnetic. All metals are not considered magnetic. A common misconception easily corrected by observing a common magnet's effect on brass, copper, or aluminum.
Discussion Questions:
-What do you know about magnets that should help you make good predictions?
-What is the most important piece of info about an object that will help you make a good prediction about its magnetic attraction?
-How many objects were attracted to the magnet?...not attracted?
-Were you surprised by the reaction of any of the objects? Why? What happened?
-Did everyone have the same results? What caused the differences?
Wednesday, July 8, 2020
Sound - Sound is Vibration
The purpose of this lesson is to show students how sound is created through vibrations, and how different vibrations make different sounds.
Materials:
Wooden Rulers
Tuning Forks
Popsicle Sticks
Ping Pong Ball
Rubber Band
Thread and Tape
Pencil
Glass of Water
Butcher Paper
Background Information:
Energy must be used to produce sound. Whether it is the plucking of guitar strings, the striking of a drum, or the blowing of a trumpet, energy is involved. The energy causes the object to vibrate, producing sound. Whenever a sound is produced, somethings is quivering, throbbing, or vibrating. Such movements are the basis of the sound we hear. Sound vibrations can be something we see, like a violin string vibrating; or it can be something we feel like the vibration of a person's vocal cords; or it can be something we hear, like a ticking clock. All the sounds can be traced to a vibration of some material.
In order for a sound to be heard. the vibrating material must move back and forth at least 16 times per second. The vibrating materials may be solid, liquid, or gas.
There are 2 separate activities that can be done for this lesson. The first one is having the students close their eyes and listen to all the sounds they hear for a full minute, then have them open their eyes and record what they heard. Then have them do it again with their eyes open. After that is done you can take them outside, if possible, and do it all again.
The second activity involves them using all the material to discover vibration and sounds for themselves. Once the activity is done have the students record what they found on the butcher paper.
Both worksheets for these activities can be found here: Sound is Vibration
Discussion Questions:
-What do all the sounds have in common? [vibrations, vibrating sources, traveling energy]
-What do vibrating objects look like? [objects moving back and forth rapidly, blurry]
-What do vibrations feel like? [tingly, wiggly, etc.]
-Describe the change in sound when you move the pencil and change the length of the rubber band. [the sound becomes higher or lower. The rubber band vibrations are different]
-What caused the ping pong ball to bounce away from the tuning fork? [rapid back and forth movements of the tines of the tuning fork]
Extensions:
Have the students remember sounds that they enjoy hearing. List their responses on a chart labeled "I Like to Hear..." Have them remember sounds that they did not like to hear and add those to the list under "I Do Not Like to Hear..." Later categorize the list into high, low; loud, soft sounds.
Brainstorm some important sounds and how people should react to them. [fire alarm, fire engine and ambulance siren, school bells, smoke detector alarm, teacher or police officer's whistle]
Tuesday, July 7, 2020
Sound - Paper Cup Telephone
The objective of this lesson is to demonstrate how sound can travel through solids.
Materials: paper cups, string cut into 6 meter lengths, sharp pencil, paper clips.
Procedure:
1. Make a small hole in the bottom of the cups with a pencil
2. tie one end of the string to the paperclip and feed the other end of the string through the inside of the cup, that way the paper clip is on the inside of the cup
3. Thread the other end of the string through the bottom of the other cup and tie a paper clip onto the end of it so that both cups are tied together in opposite ends of the string.
4. Allow the students the chance to discover how to operate their telephones.
Below are some other suggestions you can have the students do to experiment and hypothesize with different types of sounds and vibrations.
Subscribe to:
Comments (Atom)
-
Elephant Toothpaste is an easy, fun, entertaining and engaging lesson activity that shows students how a chemical reaction works. For this ...
-
The purpose of this lesson is to show students how sound is created through vibrations, and how different vibrations make different sounds. ...
-
 The purpose of this lesson is to teach students the different cloud types and their purposes. Below is a link that contains two different a...